Bedframe "Skyline"
To create an illusion of a city skyline I used a sheet of MDF with some LED back lighting. This bedframe is just an example on what can be created using this method with a cut out shape and some lighting. Only the imagination limits which effects that can be created by varying the shape and/or the colour of the lighting.
How I made it:
In this case the bed was a standard size single bed, measuring 90 x 200 cm (roughly 35" x 79"). The goal was to create a nice looking background that also would protect the wall, without interfer too much with the window. The material used for the backing is a standard 16 mm (5/8") MDF and this size require one anda a half full size sheet, that is 1220 x 2440 mm (roughly 4' x 8'). The frame on the back side is also from the same MDF and is for creating som distance from the wall to mount the LED-strip.
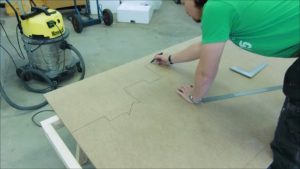
I started to cut the sheets to their maximum outer dimensions and just sketched a random cit y skyline from the top of my head that felt right. If you don't limit yourself to a certain city skyline, there can be no wrong! If it looks good, it is good! For the strait lines I of course used a strait edge and then some random round objects for the curves. When I felt done with sketching I filled the lines with a black sharpie in order to see the shape a bit better.
When I had decided on the contour it was just to get the jigsaw and start cutting according to the lines. If you decide to make round holes or concave shapes you could also use a holesaw.
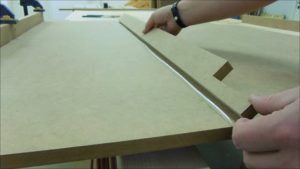
 From the waste of one of the MDF boards I cut some 50 mm (roughly 2") strips to make the frame. These were attached with glue and brad nails. The cut outs on the bottom is to allow for the trim allong the floor. I wanted the bedframe to be able to get all the way in to the wall.
All marks from the brad nails were covered with putty and then sanded flat. I also sanded all the edges slightly to get rid of the marks that the jigsaw left. It also helps the painting to last longer. To make sure that the edge not got out of square when I sanded it I made a 90º sanding block with a piece of MDF and some plywood.
Due to practical reasons the bedframe was built in two parts that easily were assembled by three M6 bolts. This is why I attached three tee nuts to one of the pieces. I fitted the pieces and held them together with some quick clamps before I drilled a 6 mm hole. If you want to use imperial size bolts, consider 1/4" instead. The part where I mounted the tee nuts I had to enlarge the holes with a bigger drill bit. I also marked out the placement of the small "spikes" and predrilled for these. This is important when you work with MDF, which is very compact and can crack easily.
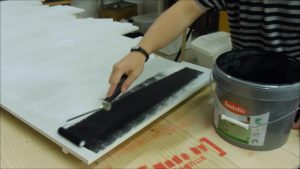
All the surfaces were cleaned from dust and coated with primer. After a light sanding I covered it with two coates of black paint.
When the paint had dried it was assembled in the bedroom and the LED strip was attached with the self adhesive backing. The transformer had an ordinary plug so I used a socket with a breaker to connect it to the wall socket.
